There are a few ways to harvest basil but one of them is significantly better than the rest. If you do it the wrong way, you will get to a point where there are no more leaves to pick. If you do it correctly, however, it will not only keep growing but also become bushier and produce more and more leaves as you harvest.
In this article, I explain precisely how you should harvest your basil so that it will keep growing and produce more and more leaves for you. After that, I explain four ways to store all that basil so it stays good until you need it.
Easiest Way to Harvest Basil So It Keeps Growing
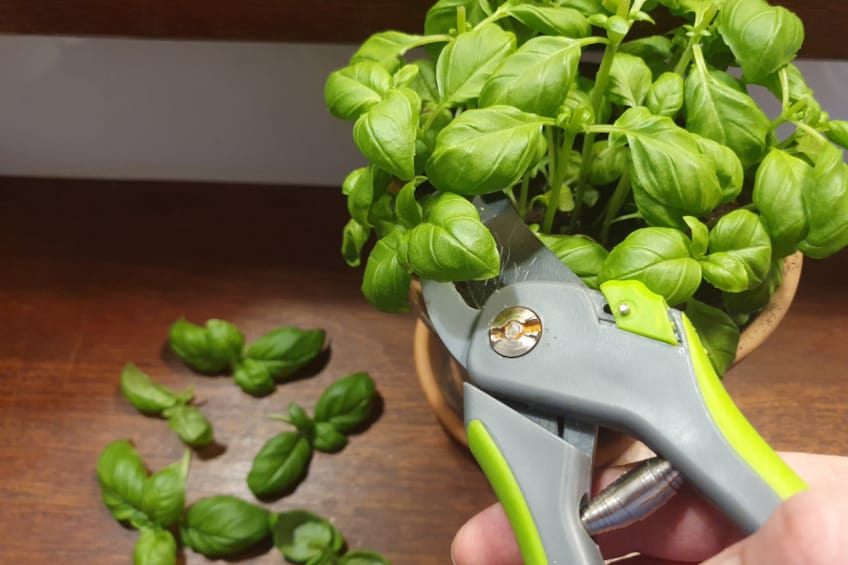
The easiest way to harvest basil, so it keeps growing is by cutting or pinching stems just above a leaf node. This will cause two new stems to grow out instead of the one that was cut, thereby making the plant bushier and more productive while you get to use the parts you cut off.
The best tip for harvesting basil is to start harvesting early and do it more and more frequently as the plant grows faster and faster. There should be at least three leaf nodes on the stems before you start to harvest from them, though. This ensures that it doesn’t take too long for the new foliage to grow.
Cutting or pinching stems instead of picking individual leaves is probably the best thing you can do to increase the overall yield from your basil plants.
Sure, you can pick a few leaves if that is all you need, but if you need more than that, just cut or pinch some stems. As I explained, this is because it will divert the energy into the leaf nodes, making them grow as two new stems instead of the one you cut, making your plant bushier and more productive.
Of course, you can just eat the basil you harvest, but you can actually also use some of the cuttings to grow a lot more basil for free. If you are interested in that, I have a guide for you on this link.
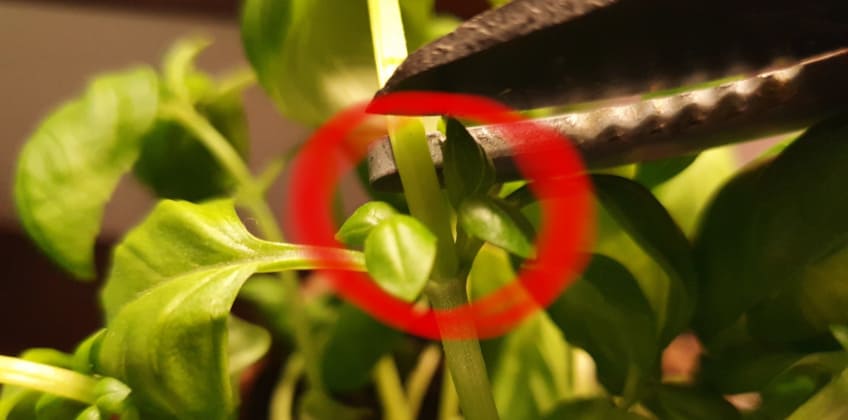
Here is a picture to show you precisely where you should cut the stem on your basil plants when you harvest them. The two small leaf nodes on both sides of the stem will grow as two new stems.
The exception to the tip above is for some of the lower leaves once your plant is larger and more well-established.
If there are a lot of leaves on your basil plant, you might as well pick and use the lower ones. At that point, the plant has enough leaves to absorb all the sunlight it needs, and removing some lower leaves will even improve airflow slightly, so you might as well do it.
If you notice flowers on your basil plant, you should remove them the same way as I have taught you to harvest. By pinching or cutting the stem off. This keeps the plant growing and producing whereas it stops growing and focuses on flowering instead if you don’t remove the flowers. You can read more about that on this link.
With all that tasty basil you’re harvesting, you are probably going to want to store some of it so you can use it later. I have four easy ways that I sometimes use to store basil when I harvest a lot of it. I’ll explain them now.
4 Ways to Store Basil for a Long Time
Now that you know how to grow and harvest basil so your plants keep growing and getting more and more productive, it is time to learn how to store all those tasty leaves. I have found four ways you can use to store basil for a long time that I want to share with you here.

Hang drying
Tie some thread or cord around the bottom of a bunch of freshly harvested basil stems (with leaves) and hang them somewhere with good airflow until they dry. If they hang somewhere with poor airflow, there is a higher risk of mold.
Let them hang for 2-3 weeks and then take them down. When the basil is completely dry, you can use a blender to easily turn it into tiny pieces or a powder that you can save and use in cooking whenever you want.
Only use fresh, green leaves and stems, and throw away the brown ones. Make sure to store the dried basil in a dark and dry place, and it will last for a long time. This is my personal favorite way of storing the basil I can’t use when it is fresh.
Freeze it when it is fresh
Simply place your freshly harvested basil in a bag or a container that can be frozen and put it in the freezer.
Fresh and green stems and leaves can be saved and if some of them have started to turn brown or woody, just throw them out.
Freezing your basil keeps it fresher than if you dry it but it takes up a lot more space.
Freeze it in ice cubes
This way is similar to the one above but instead of just freezing your basil when it is fresh, you chop it up into small pieces that you spread around in an ice cube tray so that each ice cube will have as much basil as possible. Then fill the tray with water and freeze it. Take a few basil ice cubes and simply add them directly to the food when you are cooking whenever you need it.
Freeze it in olive oil
This is probably mostly relevant if you are planning on making pesto but it can absolutely also work for other dishes. Like above, you just fill an ice cube tray with as much fresh, chopped basil as possible but then fill the tray with olive oil instead of water. Take however many cubes you need when you make pesto or cook.
Read My Complete Guide to Growing and Caring for Basil
I have written a thorough guide where I cover all parts of growing your own basil including choosing a variety, sowing the seeds, the best growing conditions, pruning, propagation, harvesting, storing, solving various problems, and a lot more. You can find the article on this link.
