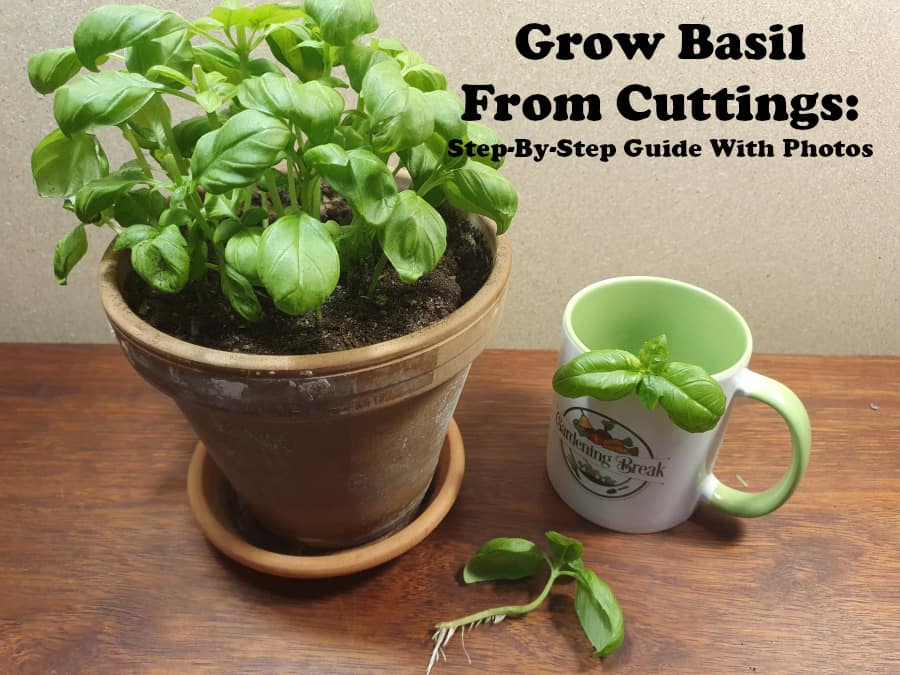
There are many ways to increase your basil production, but the best way is without a doubt by taking cuttings from a plant and growing them as new plants. This technique is also called propagation and is one of the coolest gardening techniques there is, and it is actually a lot simpler than it sounds.
In this post, I walk you through every step of the process of propagating basil by taking cuttings and growing them as new plants. I recently did it with one of my own basil plants, so I have fresh photos of every step, so you can see precisely how it should look.
Here are the steps to grow basil from cuttings.
- Get a basil plant, a glass, water, and scissors
- Identify new leaf nodes on the plant
- Cut main stems above the third leaf node
- Remove the lower leaves from the cuttings
- Place the cuttings in water (only the stems)
- Replace the water every 2-3 days
- Wait 2-3 weeks for roots to grow
- Get your rooted basil cuttings, a pot, and soil
- Fill the pot halfway with soil
- Plant the cuttings and fill the pot with soil
- Water your new basil plants well
It might seem like many steps, but don’t worry, they are super simple, and I included absolutely everything, including steps that might seem obvious, to make it as easy as possible for you. I go into more detail and explain precisely what you should do in each step below.
Let’s get into it!
1. Get a Basil Plant, a Glass, Water, and Scissors
Before you can get started with growing some basil plants from cuttings, you need to find a couple of things.
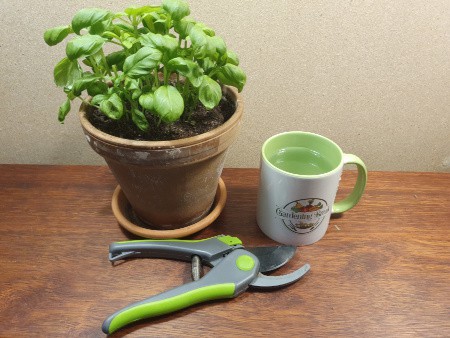
Find the basil plant you want to take cuttings from, some pruning shears (or clean scissors), and a glass or cup filled with water.
Basil propagation works best when you take cuttings from a big plant, but to be honest, you can do it with a basil plant of almost any size. The thing is that the bigger cuttings you take, the faster you can grow them as new plants, but more on that in a bit.
2. Identify New Leaf Nodes on the Plant
How you take your cuttings, and specifically where you cut, is important. The best way to find out where to cut is the look for leaf nodes.
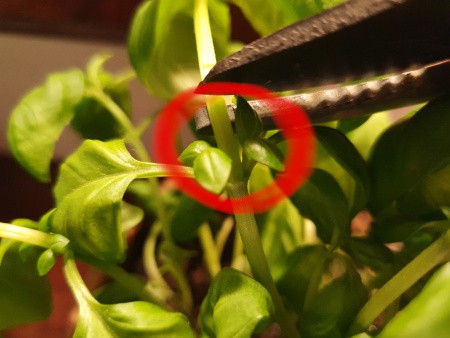
Leaf nodes grow along the stems of basil plants. They look like two tiny leaves that grow in the joint between the stem and a leaf. The red circle on this photo shows a set of leaf nodes.
Identify some leaf nodes somewhere on the top half of all the stems you want to take cuttings from. If you cut too low on the stem, it will not grow back as well as if you cut closer to the top. I recommend cutting no lower than the third set of leaf nodes from the bottom.
3. Cut Main Stems Above the Third Leaf Node
I recommend that you cut just above the third set of leaf nodes and not lower than that to allow the plant to grow back faster. You can technically also cut just below leaf nodes since the leaf nodes contain the most concentrated amount of the hormone that causes roots and leaves to grow, which means the cutting would be good at growing roots, but I don’t recommend that.
I strongly recommend taking cuttings above leaf nodes and not below them because it will make the original plant much bushier and more productive, and you still get more than plenty of roots on your cuttings, even though you cut above a leaf node. I have done it so many times, and it always works.
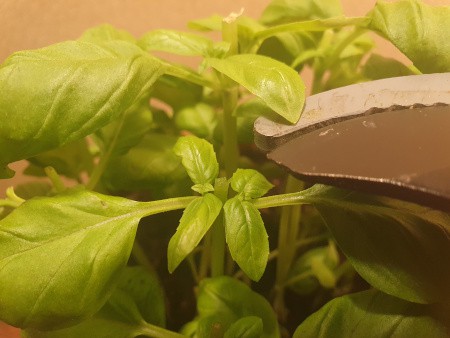
Use clean scissors or pruning shears to take cuttings and cut just above a set of leaf nodes. Cuttings should ideally be at least 5 inches (about 12.5 cm) long for the best results, but less can also work.
See the photo to see precisely where I want you to cut the stems. Two new stems will begin to grow from the leaf nodes where I cut instead of the original one, making the plant bushier and more productive.
The reason why I recommend taking cuttings that are at least 5 inches (about 12.5 cm) long is that the bigger the cuttings are, the more roots they can grow, and the faster and better they will grow when planted.
4. Remove the Lower Leaves From the Cutting
The whole goal of what you’re doing right now is to make your basil cuttings grow roots so that you can plant them in soil. You make the cuttings grow roots by submerging their stems in water. So I recommend that you remove all the lower leaves so more of the stem can be submerged because more roots lead to a stronger plant.
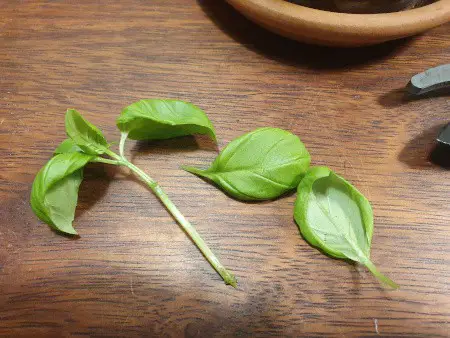
Gently remove all the lower leaves but do not remove the top four to six leaves as they are needed to absorb sunlight.
It is crucial that you keep the top four to six leaves, or the cutting will die quickly. If your cuttings look like the one in the photo above, you’re ready for the next step.
5. Place the Cuttings in Water (Only the Stems)
Fill a glass, cup, or bowl with water. Anything works as long as the stems can be submerged in water.
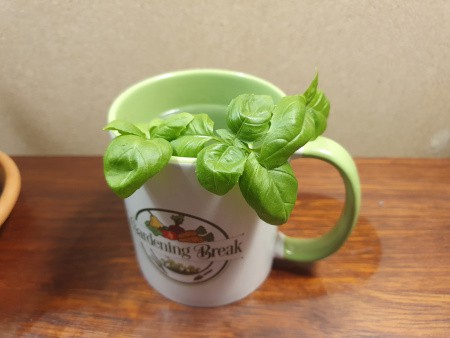
Place the stems from your basil cuttings in water, but keep the leaves out of the water, as shown in this photo.
Keep an eye on your cuttings to make sure they don’t fall all the way into the water because the leaves need to obtain some light, and they can’t if they are underwater.
6. Replace the Water Every 2-3 Days
It is a good idea to keep the water somewhat fresh, and since it takes some time for the roots to grow, some water will also evaporate, so you need to replace and refill your glass or cup sometimes.
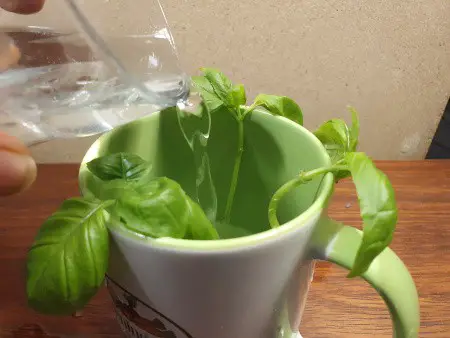
Replace the water your cuttings are placed in every two to three days for the best results.
Keeping the water as fresh as possible is not crucial, but in my experience, the roots appear a bit faster if you replace the water every now and then. What is crucial, however, is that there is water, so if (or when) some of it evaporates, you need to add some new.
7. Wait 2-3 Weeks for Roots to Grow
It takes a while for the cuttings to grow roots, so don’t be alarmed if you don’t see them within the first few days. They usually begin to appear within a few days to a week, but it depends a bit on where you cut the stem and how much light they get.
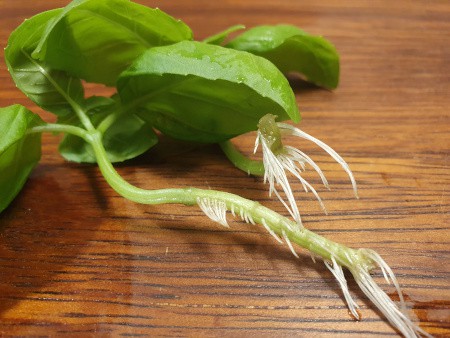
After two to three weeks, the submerged cuttings should have developed some roots along the part of the stem that was in the water (see the photo).
The hardest part about this step is to not get too eager and stop the rooting too early because the bigger the roots get, the faster the plant will establish itself after being planted. I actually recommend waiting a bit longer than I did (see the photo), but once they look like that, they are ready.
8. Get Your Rooted Basil Cuttings, a Pot, and Soil
Time to plant your rooted cuttings! But first, you need to get a few items.
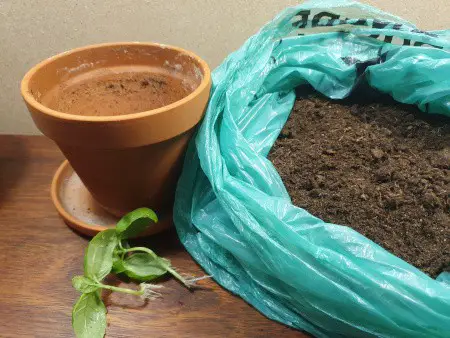
Take your basil cuttings, some nutrient-rich soil, and a pot that is at least 8 inches (20 cm) in height and diameter.
Basil grows much better in a big pot than in a small pot because the roots need room to grow, or they will end up becoming rootbound which eventually stops the plant from growing and producing new leaves. You can easily have a few plants in the same pot. I recommend 3-5 rooted cuttings per 8-inch (20 cm) pot and a few more if your pot is bigger.
If you need help picking the ideal pot for your new basil plants, head over to this article.
9. Fill the Pot Halfway With Soil
It is important to have a good amount of soil underneath your rooted cuttings, so there is plenty of room for the roots to grow further.
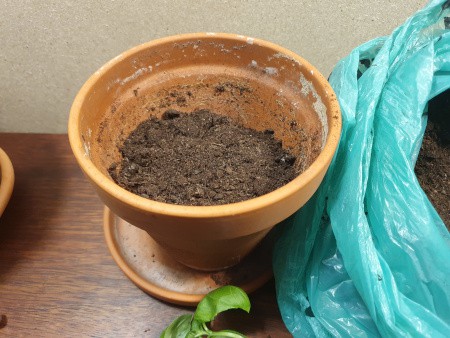
Fill a pot about halfway with soil. Depending on the size of your cuttings, you may need more or less soil. The goal is that the top of your cuttings should be above the top of the pot.
Now all you have left to do is actually plant your cuttings, so let’s do that!
10. Plant the Cuttings and Fill the Pot With Soil
This step can be a bit tricky until you get the technique. I usually hold my rooted cuttings with my left hand while gently pouring soil into the pot, around the plants with my right hand. The tricky part is to keep the cuttings stable while covering them with soil (and avoid getting soil all over the table, which I did).
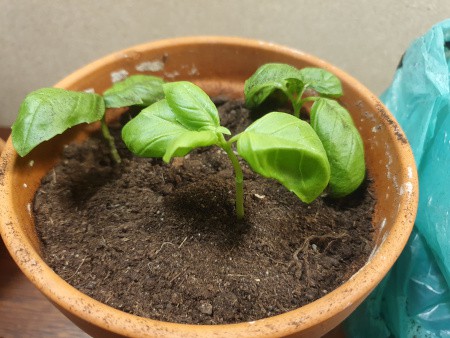
While gently holding the rooted cuttings in place, add soil on and around the roots and stems and push it lightly until the plants are stable.
Congratulations, you’re done! All you have left to do is to water your new basil plants. I have some advice for that too.
11. Water Your New Basil Plants Well
I almost always recommend watering basil from the bottom (read why here), but an exception is with newly planted cuttings.
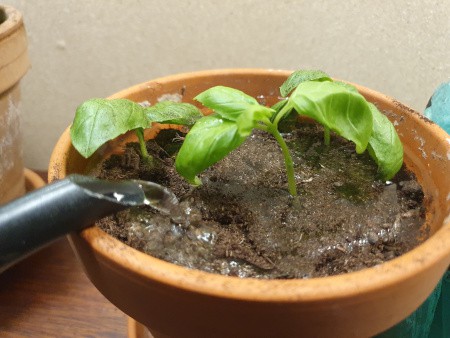
Carefully pour water on top of the soil your new basil plants grow in. Water them thoroughly the first time, and then only water them when the top of the soil is dry.
It shouldn’t be long until your cuttings establish themselves in their new place and begin to expand their root system and grow into some big, productive basil plants.
If you want some great tips for watering your basil, I recommend reading the article on this link.
Read My Complete Guide to Growing and Caring for Basil
I have written a thorough guide where I cover all parts of growing your own basil including choosing a variety, sowing the seeds, the best growing conditions, pruning, propagation, harvesting, storing, solving various problems, and a lot more. You can find the article on this link.