If you need to transplant a basil plant, this is the post for you as I describe and show precisely how to do it.
I recently had to transplant a basil plant to a bigger pot, so I figured I would take some photos of the process and write this post, so you can see precisely how to do it. The process only takes a few minutes and can improve the health and growth of your basil plant significantly.
Below, I explain each of the steps you need to follow to transplant basil.
These are the steps I cover in this post:
- Get a Basil Plant, a Pot, Soil, and Water
- Fill a Big Pot About Halfway with Soil
- Remove the Basil Plant from Its Old Pot
- Gently Loosen the Basil Plant’s Roots
- Place the Basil Plant in the New Pot
- Fill the Pot with Soil Around the Plant
- Water Your Basil Plant from the Bottom
Now, let’s dive into it.
Step 1: Get a Basil Plant, a Pot, Soil, and Water
Transplanting basil is easy, and you don’t need any fancy or complicated tools or supplies, but you do need a few things, so before you can start, you need to find them.
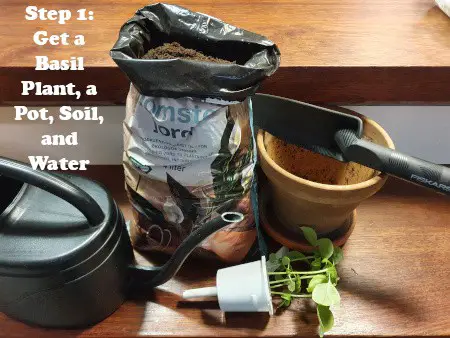
Get these things:
- Basil plant
- A big pot with drainage holes
- Potting soil
- Hand trowel (optional)
- Water
The hand trowel is optional because, to be honest, you can just use your hands. If you already have one, excellent, but if you don’t, I don’t think you need one just for transplanting basil (although I do think it’s a really good tool to have).
The best size for the pot is 8-12 inches (20-30 cm) in both diameter and height. That will allow your basil plant to have plenty of room to grow.
If you need help picking the right pot, I have a guide for you here.
You can get all these things at most plant nurseries or garden centers which I usually prefer, but you can also get them online.
Now that you have everything you need, it’s time to get started with transplanting your basil plant.
Step 2: Fill a Big Pot About Halfway with Soil
After you have gotten your basil plant, pot, soil, and water, the first thing you should do is to put some soil in the pot you want to move your basil plant to, but don’t fill it up all the way yet.
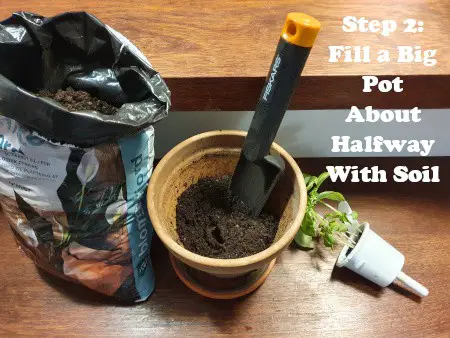
Fill the pot you want to move your basil plant to about halfway with soil. The goal is to have the plant growing at about the same level as before, but with much more soil underneath and around it, so if you use a very big pot, fill it about two thirds.
The primary goal when we transplant a basil plant is to give its roots more room to grow. That’s why it is so important to put soil in the pot you’re moving your basil plant to before placing your plant in it.
The goal is to have the basil plant growing at approximately the same level as before, but have much more soil around and underneath it, so the roots have plenty of room to grow.
In my experience, it usually fits quite well when I fill up the pot about halfway, but of course, it depends on the size of the pot and the plant. I usually use pots that are 8-12 inches (20-30 cm) in diameter and height for growing basil.
Step 3: Remove the Basil Plant from Its Old Pot
Now that the new pot is ready for a new inhabitant, it is time to free the basil plant from its old pot so it can be moved.

Remove the basil plant from its old pot by gently pulling it at the base of the stems near the soil. It can sometimes help to push or knock gently on the side of the pot to loosen the soil and the plant.
If your basil plant was growing in a small pot, chances are its roots look similar to those on my basil plant. You can see in the photos above and below how densely packed they are. When the roots are like that, it is easy to keep the soil, which is good.
When you remove your basil plant from its old pot, it is best to keep as much of the soil as possible to make the transition to a new pot easier for the plant.
If the roots are packed as tightly as they were on my plant (see photos above and below), it can be a good idea to loosen them a bit, so that is the next step.
Step 4: Gently Loosen the Basil Plant’s Roots
If the roots are packed really tight together, it can be a good idea to loosen them a bit, but it can also be a bit risky since the roots can be fragile and easy to damage.
Make sure the roots are wet and soft as they can break if they are dry.
If you’re worried about damaging the roots, just skip this step because it should work just fine without it. Loosening the roots can just make it a bit easier for them to establish themselves and start growing after being transplanted.
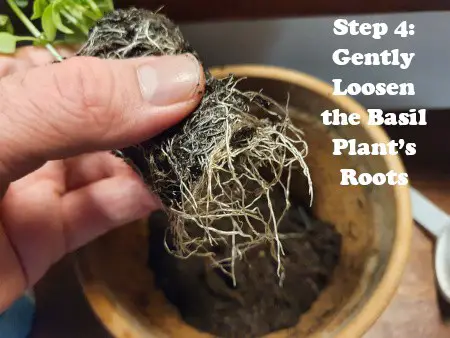
Make sure the roots on your plant are wet and soft. Then carefully loosen the roots on your basil plant by massaging them gently. The goal is to be able to spread them as much as possible rather than them being packed densely together.
Just to make it as clear as possible, the roots must be wet and soft. If they aren’t, you should let them soak in some water for half an hour or so since they are easily damaged if you try to loosen them when they are dry.
Again, if you are concerned about damaging the roots when doing this step, just skip it.
Try to make them look similar to the ones in the photo above, as that will make the next step easier.
Step 5: Place the Basil Plant in the New Pot
Now it’s time to actually put your basil plant in the new pot, and after that, you’re almost done.
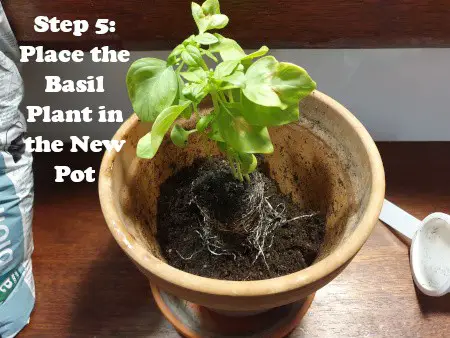
Carefully place your basil plant on top of the soil in the new pot. Spread the roots as much as possible without damaging them as that will make it easier for the plant to establish itself and begin to grow again.
If you skipped the last step and didn’t loosen the roots, it’s okay just to place it in the middle of the pot. The roots will figure it out on their own, but if you did loosen them, spreading them as described above can make it a bit easier for the plant to establish itself and the roots to start growing.
Once you’ve done this, it’s time to fill the pot with soil.
Step 6: Fill the Pot with Soil Around the Plant
Filling the pot with soil is really simple but also really important to do right.
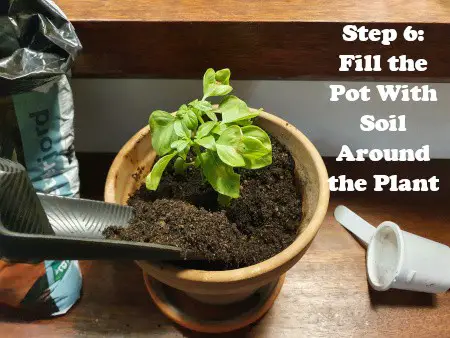
Use a hand trowel or your hands to fill the rest of the pot with soil. Cover the roots evenly all the way around the plant by filling in soil until it is about an inch (2.5 cm) from the top. Lightly push the top of the soil to flatten it, but do not push hard as it can damage the roots.
I recommend that you don’t fill the pot all the way to the top. I usually like to leave about an inch (2.5 cm) or so without soil. It’s not that important, but in my experience, it can get a bit messy if you fill the pot all the way to the top as the soil falls out pretty easily.
Step 7: Water Your Basil Plant from the Bottom
Now you’re all done with transplanting your basil plant. All you have left to do now is to water your plant. I have a complete guide on how to correctly water basil on this link, but here are the basics.
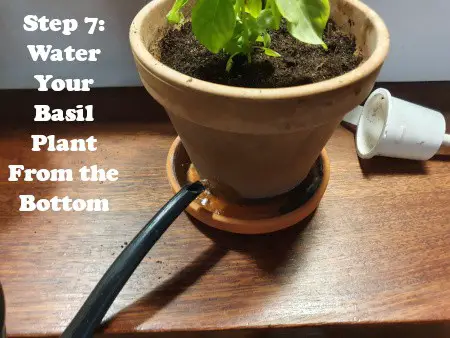
Water your newly transplanted basil plant. It is best to water from the bottom as it promotes root growth better than if you water from the top.
It takes a bit longer to water plants from the bottom, but sometimes it’s really worth it. With basil, I would say it is absolutely worth it to spend those few extra seconds it takes to water it from the bottom, as it will make the roots grow faster and better, which makes the whole plant healthier.
The reason why bottom watering is so good for basil is that it forces the roots to grow and stretch to reach for the water, and the bigger the roots are, the more efficiently the plant can obtain water and nutrients, which makes it grow faster and produce more.
You can read more about why bottom-watering is so good for basil here.
Reasons to Transplant Basil
The most common reason why people should transplant basil plants is that the plants have become rootbound and need more room to grow.
If your basil plant is rootbound, it means that the roots have grown enough to take up all the room they had in the pot. When that happens, they will no longer be able to obtain water and nutrients efficiently, and the plant will begin to grow slower and eventually die.
That is what happened to the basil plant you see in the photos in this post. I started the plant in a smart garden which is a device that provides light and water for plants automatically. It is a really cool device, but the containers used with it are very small, so I had to transplant the basil because it was getting rootbound.
Of course, you can avoid this by using a big pot from the beginning, but if you’re like me and don’t always think that far ahead, moving the plant to a bigger pot can be necessary. If your basil plant has become rootbound, there are some things you should know, so head over to this post, where I cover everything you should know.
Read My Complete Guide to Growing and Caring for Basil
I have written a thorough guide where I cover all parts of growing your own basil including choosing a variety, sowing the seeds, the best growing conditions, pruning, propagation, harvesting, storing, solving various problems, and a lot more. You can find the article on this link.
