This post contains affiliate links.
How you harvest your mint matters a lot. If you do it wrong, you risk damaging or even killing the plant, but if you do it right, the plant will grow back stronger and faster and produce even more new growth than before. I have written this article to teach you how to harvest mint the right way, so it keeps growing back.
The best way to harvest mint is to cut stems rather than pick leaves. Harvest what you need by cutting the stems back by about half and then picking the leaves off the harvested stems. Cutting the stems promotes new growth at a faster rate, whereas only picking leaves does not.
Keep reading to learn precisely where, how, and when you should cut your mint plant when you harvest it because if you know what you are doing, you can multiply your mint production many times with very little effort.
How to Harvest Mint Without Killing the Plant
One of the most common mistakes people make when growing mint is to use the wrong harvesting method. Using the wrong method will most likely not kill the plant (although it can happen), and it will most likely grow back just fine, but you will be missing out on a ton of leaves that you could have had if you used the correct harvesting method.
I want to teach you two methods for harvesting mint that make the plant grow back faster and with much more leaves than before.
Mint harvesting method # 1
The first method for harvesting mint I want to teach you is very simple, and it works really well. I use this method all the time.
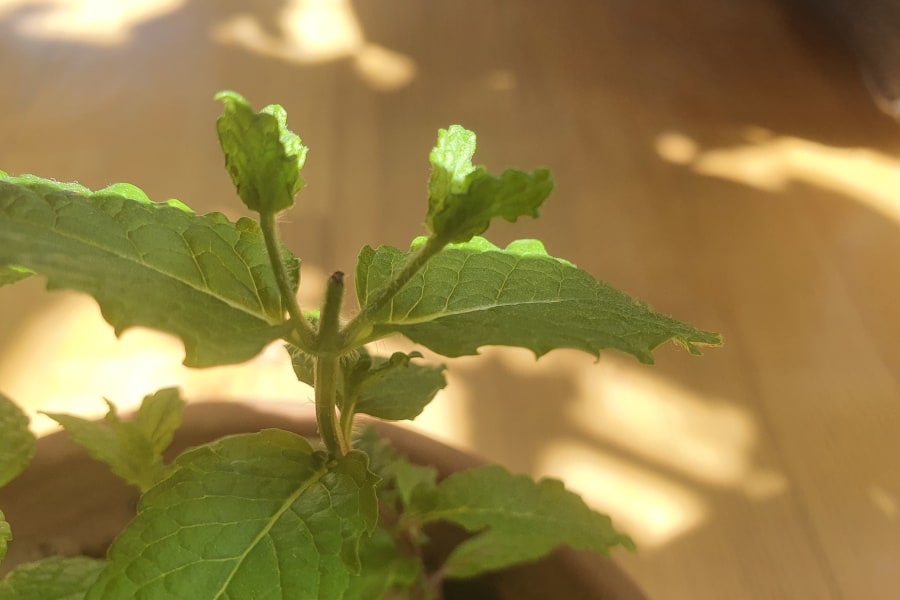
The easiest way to harvest mint without killing the plant is to just cut some stems or pinch off new shoots. This is much better than just picking leaves since it causes two or sometimes more stems to grow back from where you made the cut, making the plant bushier and more productive overall.
The key to making mint plants bushier and produce much more stems and leaves is to cut the stems as I described here instead of just picking leaves. Just make sure there are at least three sets of leaves left on the stems you cut. It won’t die if there are less than three sets of leaves, but it will take a while to grow back since it needs the leaves to absorb sunlight.
Harvest early and harvest often is the key here. That is the best method to maximize your mint yield.
I recommend that you use some clean and sharp pruning shears to reduce the risk of damaging the plant when you harvest your mint. If you don’t already have some, I use and highly recommend these (link to Amazon). They are inexpensive and I am very happy with how good they feel and how well they do the job.
You can harvest your mint with this method whenever you need some fresh mint. The only thing you need to remember is that you shouldn’t cut the stems all the way to the ground since they would otherwise take too long to grow back.
Using this method is the key to making mint plants bushier and the best way to get as much as possible out of your plants. You can read more about that in this article.
Mint harvesting method # 2
This method for harvesting mint without killing the plant is very different than the one above. I recommend using this method just as the plant is starting to flower as it will extend the growing season and delay the flowering season.
This harvesting method is more of a “take it all at the same time”-method than the one above.
To extend the mint growing season and delay flowering, you can cut the whole plant back by about half once the first flowers begin to appear. The plant will grow back quickly, but it won’t flower again for a while, allowing you to harvest for longer.
You should keep in mind that your mint is going to want to grow back over and over again, even after it flowers, since it is a perennial (read more about that here), so don’t be too rough with it. don’t cut it all the way to the ground, but leave a few inches and never remove any of the roots, as they are crucial for the plant to grow back.
It can also be a really good idea to cut your plant back like this at the end of the growing season. At this time, most of the plants will most likely seem brown and dry, so there won’t be much to harvest. It is still a really good idea to “clean it up” a bit by removing dead, brown growth, though, since it reduces the risk of diseases and mold and promotes new, fresh growth. You can read more about his and what else to do with mint at the end of the season in the article on this link.
As you can see, the idea behind both methods is to cut the stems instead of just picking leaves. Cutting the stems will cause them to split in two, making them produce twice as much as before. I have even seen it split into more than two several times before.
Of course, picking leaves instead of cutting stems as I describe here won’t kill your mint, but I still highly recommend using the methods I explained here. I especially like the first method, which is the one I almost always use.
Now that you know how to harvest your mint without killing the plant, I will explain how you can tell if the plant is ready to be harvested, so keep reading.
How to Know if Your Mint Is Ready to Be Harvested
In my opinion, there is no specific “best time” to harvest mint. Instead, the best time to harvest mint is whenever you need it. But how can you tell if it is ready?
Mint can be harvested as soon as there are green leaves to pick, however, it is best to wait until there are at least three sets of leaves on each stem you want to harvest from.
As I wrote earlier in this article, you can harvest mint as soon as there is a leaf to harvest, but I highly recommend that you wait until you can harvest so that there there are three sets of leaves left on the stems after you harvest from. Otherwise, it will take a while for it to grow back.
And then I, of course, recommend that you cut the stems or pinch off new shoots instead of just picking leaves, as I explained earlier in this article.
As I wrote earlier in this article, harvest early and harvest often. That is the most effective way to get as much as possible out of your mint plants. For more tips on getting the most out of your mint plants, check out this article.
I usually harvest what I need when I need it, but it can also be a very good idea to harvest your mint in the summer before the plant begins to flower, as that will delay flowering.
Mint doesn’t grow and produce leaves at nearly the same rate once it begins to flower, which is why I recommend cutting the stems before the plant flowers.
I have strongly recommended that you cut stems rather than pick leaves when you harvest mint, but what if you only need a few leaves? Is it fine to just pick a couple of leaves without cutting or pinching stems? I explain that below.
Does Picking Mint Leaves Damage the Plant? Explained
I have advocated pretty strongly for cutting stems or pinching off new shoots instead of picking leaves when you harvest mint. But what if you only want a few leaves or if you just prefer not to cut the stems? Is it fine to just pick the leaves, or will it hurt the plant?
It is fine to harvest mint by picking some leaves. The plant won’t take any damage as long as you pick them carefully. However, you should keep in mind that the plant needs the leaves to absorb sunlight, so if you remove too many at the same time, the plant will grow slower.
So, in other words, if you just need a handful of mint leaves for some food, drinks, or anything else, it is totally fine to just pick some leaves.
It can also be a very good idea to pick some of the older, lower leaves on your mint plant. They tend to turn yellow and fall off over time, so you might as well pick them before that happens.
The new and fresh, smaller, light-green leaves taste the best, in my opinion, so that’s why I like to pinch off new shoots from my mint plants sometimes.
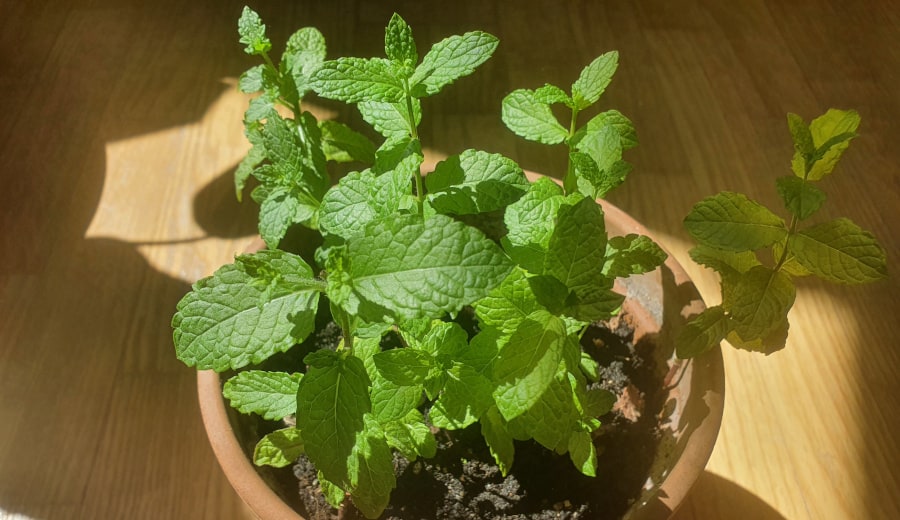
The larger and bushier your mint plant is, the more leaves you can pick without damaging the plant or affecting the growing speed. If your mint plant is very small and you suddenly remove most of the leaves at the same time, it will take a while for it to grow back fully.
That is why I recommend cutting stems or pinching shoots. Because it makes the plant grow back bushier and faster than before.
How to Know Which Mint Leaves to Pick First
Part of getting as much as possible out of your mint plant is to know which leaves you should pick first. To be honest, it is not very complicated, and it is hard to do it very wrong. Here is what I recommend.
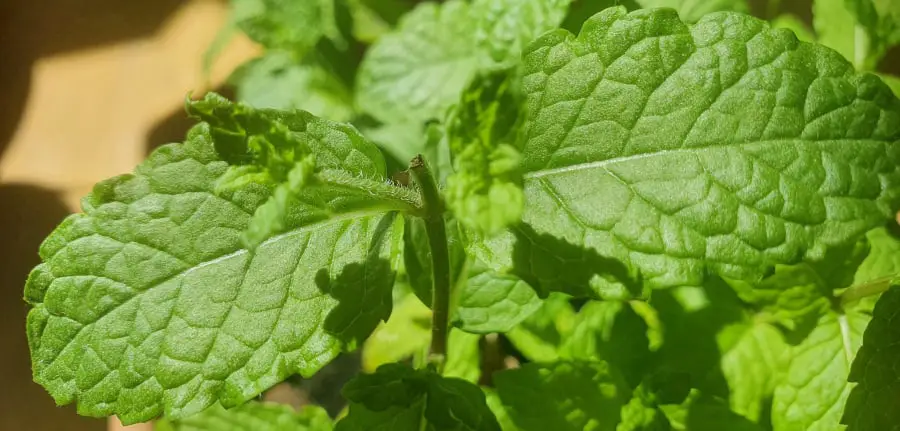
The newest leaves on a mint plant taste the best, so to get to pick and use them while allowing your plant to keep growing, I recommend pinching off new shoots. This causes two or more new shoots to grow, allowing you to harvest more and more fresh leaves.
As I wrote above, some leaves, especially older or lower ones, tend to turn yellow and fall off with time. Instead of letting them go to waste, you can keep an eye on your plant, and when you notice leaves starting to get lighter, you can pick them off the plant and use them. It won’t hurt the plant since it was about to get rid of those leaves anyway, so you will only be doing your plant a favor.
Now that you know my recommendations for harvesting mint, it is time to learn the best ways to store the leaves you harvested. I cover three simple but great methods for that below, so keep reading.
Best Way to Store and Preserve Fresh Mint (3 Easy Methods)
If you harvest more mint than you need right now, you should know how to store and preserve it properly, so you can get to use it later.
I have three easy methods for storing and preserving mint that I want to share with you. See which method suits you best, or simply try all three to see which one you like more. I personally prefer the first and the last methods.
1. Drying mint leaves
Drying is probably the easiest way to preserve freshly harvested mint.
The easiest way to dry fresh mint is to tie a small piece of thread around the base of the sprigs and then hang them upside down somewhere they can hang freely. They will usually be fully dried within about a week.
If you only picked leaves from your mint and don’t have any stems to tie the thread around, you can just spread the leaves out on a sheet of baking paper, kitchen paper, kitchen towel, or similar and leave them for a few days until they dry.
If you prefer your dried mint to be chopped very finely or almost pulverized, you can put the dry leaves in a blender and blend them for a few seconds. The longer the blender is on, the more finely chopped the mint will be. I often do this with herbs I harvest and dry.
2. Freezing mint leaves
Freezing the mint leaves or whole sprigs is probably the closest we can get to keeping them fresh. Of course, they will not feel or taste as fresh as freshly harvested mint, but it gets a lot closer than the other methods here.
The easiest way to freeze your mint is to put the leaves in a small bag or between two sheets of paper or something else that can go in the freezer. Place the mint somewhere it can stay staple in the freezer, and take it out when you need it.
This method works really well for mint you want to use in drinks or similar.
3. Freezing mint leaves in ice cubes
Another method for storing mint that I recently started using (and really enjoy) is freezing it in ice cubes.
Take some freshly harvested mint and either chop it or leave it as it is, depending on what you prefer. Put it in an icecube tray and fill it with water. Put the tray somewhere it can stay staple in the freezer and wait for some time, depending on the size of the ice cubes.
I really like to use this method for water or other cold drinks. The ice cubes keep the drink cold, and the mint adds a great taste.
These are the methods for storing and preserving mint that I have had the most success with, but there are also other methods. I found this paper from Oregon State University Extension Service that mentions a couple of other methods that sound very interesting.
