Growing plants in tin cans can save you money and space and is a fun way of recycling your tin cans. With a little bit of preparation, you can turn a regular tin can into a perfect pot that looks aesthetically pleasing and is extremely functional.
Before writing this post, I thought about how I could best convey the information to make it as easy as possible to get started with growing plants in cans. I decided to start from the beginning and go through the entire process step-by-step and take photos of every step. That way, you can know exactly what you need to do.
Below, you will find an easy step-by-step guide with photos and a short, precise description of every step you need to go through to get started with your own tin can garden.
1. Get Cans, Tray, Soil, Seeds, and Water
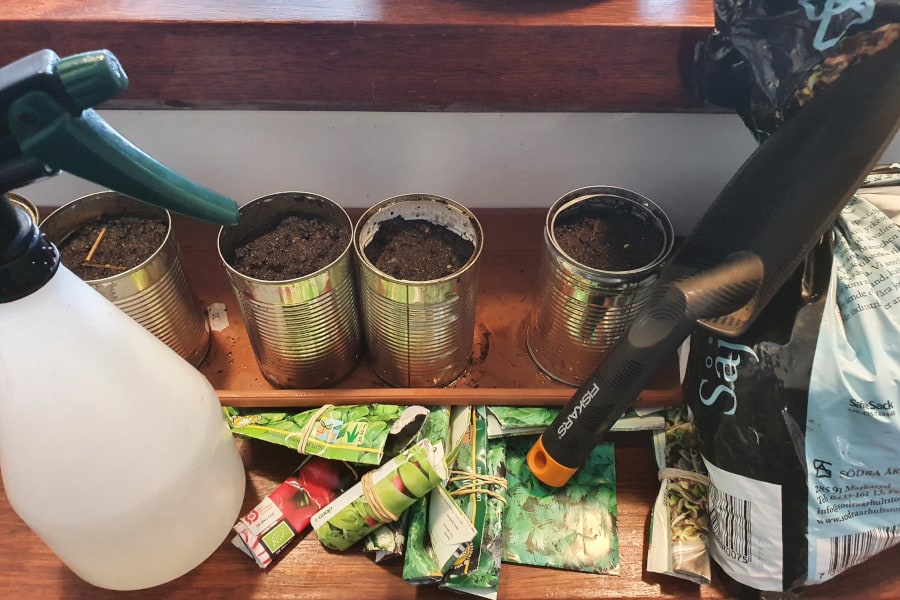
The first thing you have to do before getting started with growing your favorite garden plants in cans is to gather the supplies you need. Once you have everything you need, getting started will be easy, and you will be growing plants in cans in no time.
This is what you need for growing plants in cans:
- Empty tin cans
- Tray or plate to place the cans on
- A file to smoothen sharp edges
- A hammer and a nail
- Potting soil
- Seeds
- Water
- Fertilizer
- Hand trowel
A hand trowel is not really mandatory. If you don’t have one, you can easily use your hands, although you should be careful since the edges of the cans can be sharp.
In the beginning, you won’t need the fertilizer, although you will need it later as your plants are starting to grow. For now, all you need are cans, a tray or a plate, a hammer and a nail, potting soil, seeds, and water.
You will use the hammer and nail for making holes in the cans to provide the plants and soil with better drainage, but before you get there, you have to clean the cans thoroughly.
Other than the hammer and nail (and of course the cans), growing plants in cans generally does not require any other supplies than growing plants anywhere else.
When you have gathered the supplies you need, you are ready to move on to the next step.
2. Use a File to Smoothen Sharp Edges on the Cans
This step is technically not required, but I highly recommend doing it right away anyway since the edges of tin cans can be extremely sharp and pointy.
I cut my finger on one while preparing my cans, and I can certainly say that it is not very pleasant. Smoothening the edges of your cans takes a few minutes and can prevent you from hurting yourself.
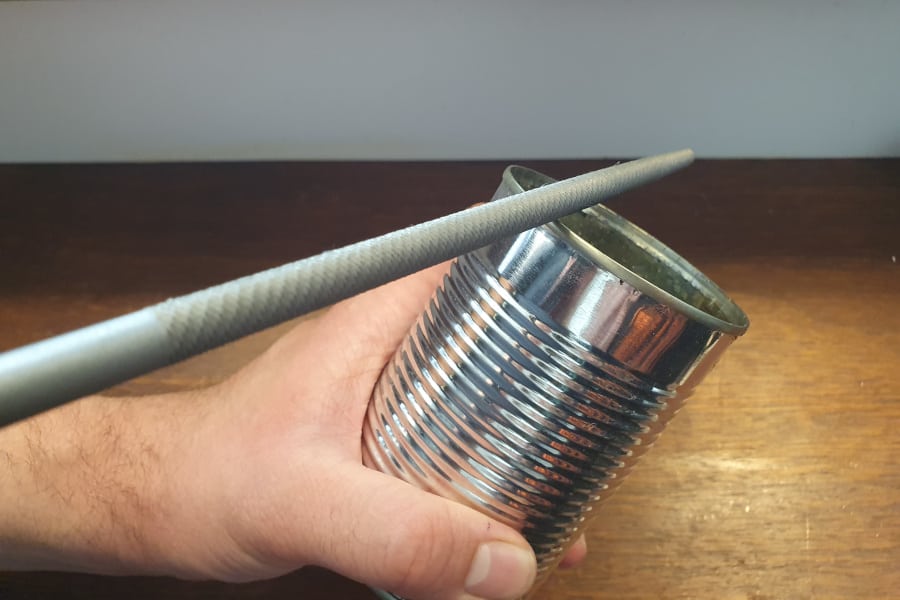
The easiest way to make sharp edges on a tin can smoother is to use a file. They can be bought cheaply in hardware stores or online.
As you can see in the photo, I used a round file to make the edges of the cans smoother. I just got it at a local hardware store for about $5.
Once you are done with this, rinse the cans with water to remove any small metal pieces that may be left.
Below, I explain what I found to be the most efficient way to clean the cans once the sharp edges have been smoothened.
3. Clean the Cans Thoroughly with Water and Soap
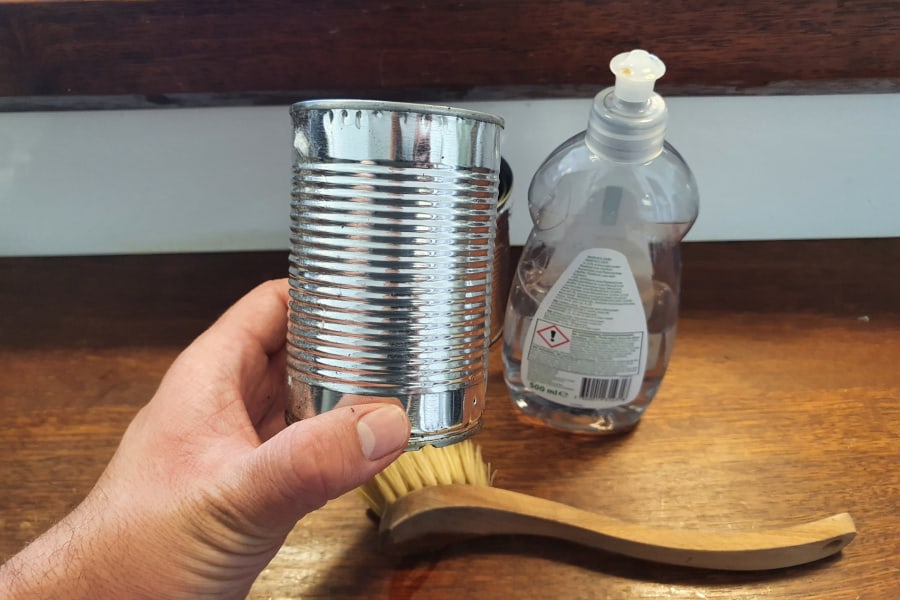
Not that you have gotten rid of sharp or pointy edges, the first thing you have to do is clean the cans.
Clean the cans thoroughly with dishwashing soap and rinse them with boiling water to remove any traces of soap or leftovers from the cans. Cleaning the cans thoroughly will give your plants a better chance of doing well since soap and leftovers in the cans can lead to diseases in the plants.
Once this is done, you can move on to the next step; providing the plants and soil with good drainage.
When doing this myself, I tried a couple of different ways and found one, in particular, to be easier than the others. Below, I explain exactly how you can easily provide your plants and soil with good drainage when growing in cans.
4. Use a Hammer and Nail to Make Holes in the Cans
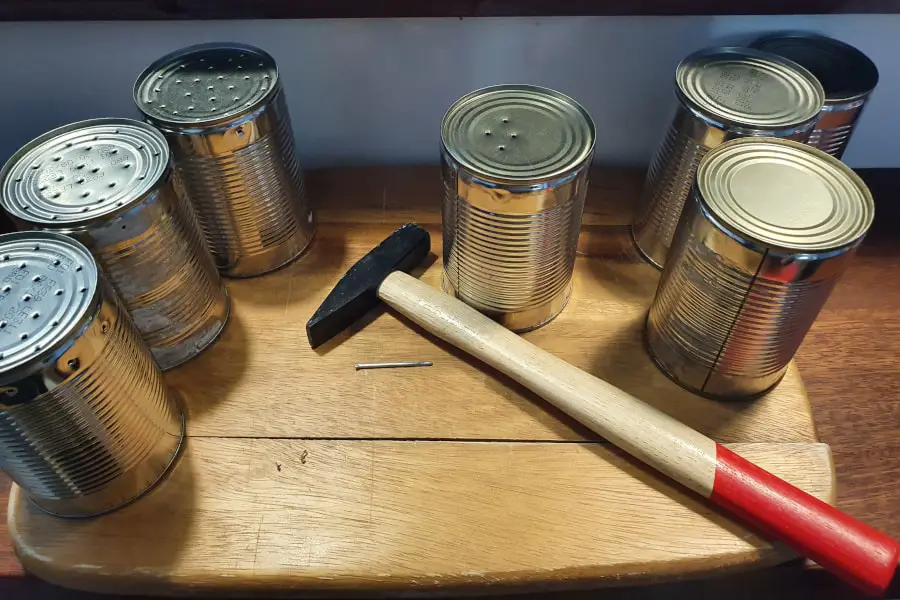
This step is easy to overlook, but making holes in the cans to provide the plants and soil with good drainage is actually perhaps the most important step when growing plants in cans.
Making holes in and around the bottom of the cans is crucial when growing plants in cans. The reason is that the soil must be well-drained. If there are no holes, the water cannot flow through and will stay inside the cans, which can cause the roots to rot and ultimately kill the plants.
When I first wanted to make holes in my cans, I tried with a drill, but after trying for a bit, I learned that it was much easier to use a hammer and a nail. It was both much faster and less noisy, so I highly recommend doing it that way.
Now, you are ready to put some soil in the cans, so let’s move on to the next step.
5. Fill the Cans About 80% With Soil
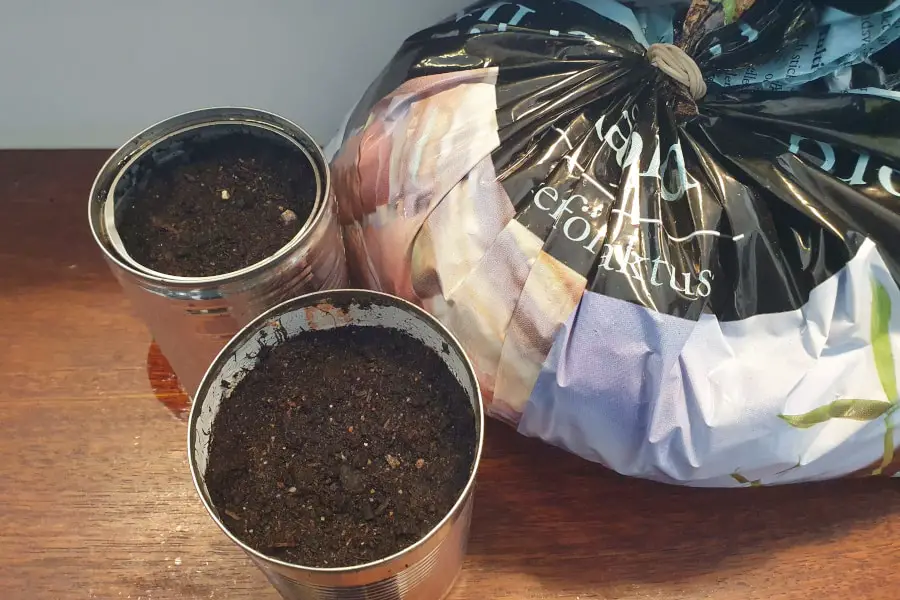
At this point, you are done with preparing the cans, and you are ready to start growing plants in them, so it is time to get the soil that you found earlier.
As a general rule, potting soil or other types of soil with no sticks, twigs, or other large, solid pieces of organic material works best for growing plants in cans. The reason is that since cans are relatively small containers, sticks, twigs, or similar can take up space and prevent roots from spreading as efficiently.
I recommend filling the cans about 80%, so there is about an inch (2.5 cm) of space left at the top. The reason is that as your plants will start to grow, so will their roots and as the roots are growing, they take up more and more room in the cans and will eventually raise the top of the soil a bit so if the soil is too close to the top, it will overflow.
After you sow your seeds (which is the next step), you have to cover them with a thin layer of soil, so leaving a bit of room for that is important.
Once you have (almost) filled the cans with soil, push the soil lightly with two fingers to flatten it. Only push it very lightly, though, since pushing it too hard will make the soil too dense, which can make it harder for the roots to spread.
6. Place Your Seeds on top of the Soil
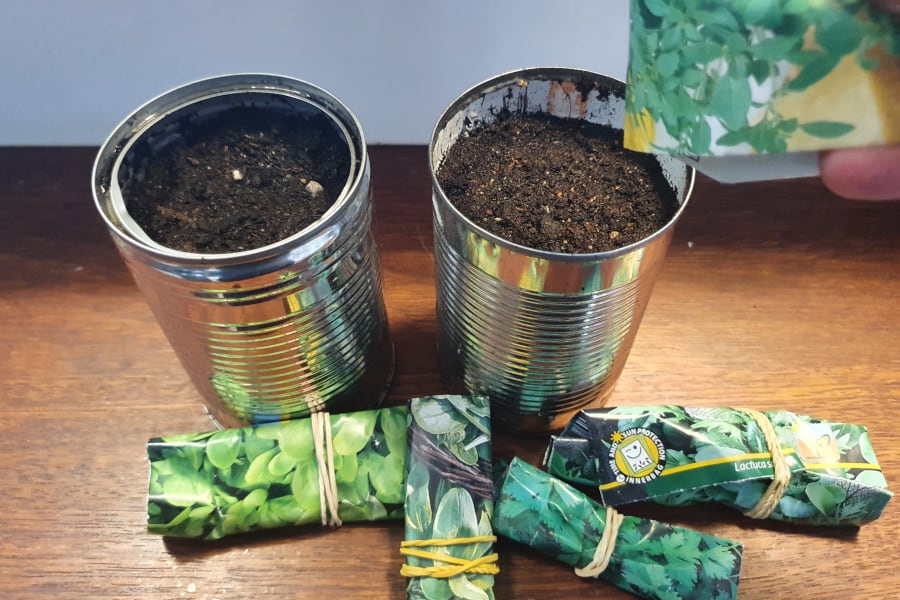
Time to sow your seeds!
When sowing your seeds, read on the pack how deep each seed should be since it depends on the type of plant.
The best plants to grow in a can have small root systems since a tin can is a relatively small container, so plants with large root systems would quickly become root-bound which inhibits growth significantly.
When I had to decide what to grow in my cans, I went to a local plant nursery and asked one of the gardeners for some advice.
This is what the gardener suggested for growing in cans:
- Spinach
- Lettuce
- Purslane
- Sprouts
- Basil
- Mint
- Chives
- spring onion
- Garden cress
These are just some of the plants that can work great when grown in a can. For a more comprehensive list, see this post.
If you have some plants in mind, but you are not sure how well they would grow in cans, use Google to find out what their root systems look like (i.e., search for “spinach root system”). If the root system looks small enough, it will most likely work just fine. Avoid growing plants with large root systems in cans.
I personally ended up choosing lemon basil, spinach, a lettuce mix, purslane, and a mix of different sprouts, and they all worked really well.
7. Cover the Seeds with a Thin Layer of Soil
If you did not fill up the cans to the edge, you have some room to work with, and this step will be easy.
As a general rule, seeds should be covered with soil equal to twice the length of the seed. However, some seeds need to be covered with more soil than others, so make sure to cover the seeds according to what is written on the seed packs.
Once you have covered the seeds with soil, you are almost done.
The only things you have left to do before you can enjoy your homegrown can-plants are finding a suitable place for them and then waiting while watering them and giving them fertilizer.
While finding the right place for your plants is pretty easy, it is essential since it can give you a bountiful harvest, and the wrong place can lead to a failed experiment.
Before finding the right spot for your plants, you need to place your cans on a tray or a plate.
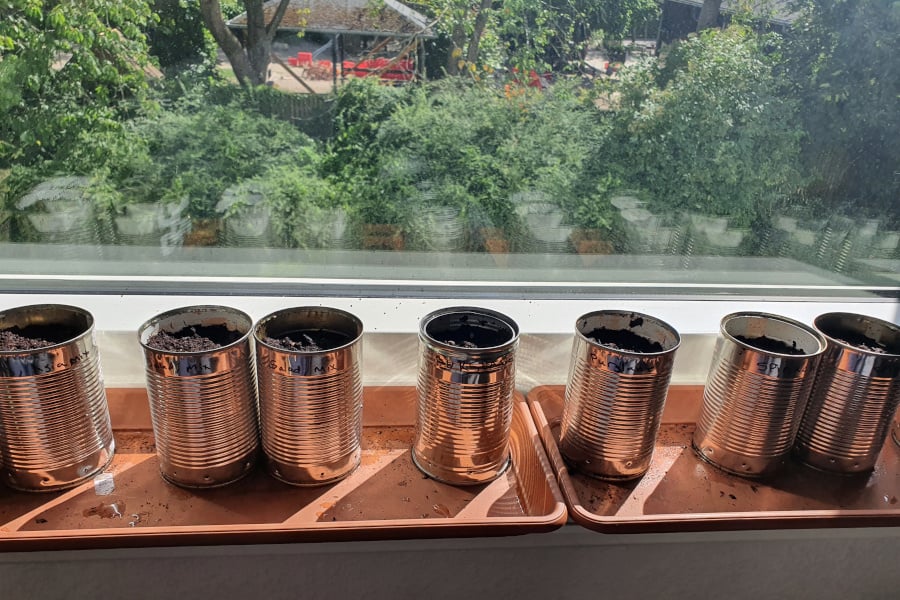
8. Place the Cans on a Tray or Plate
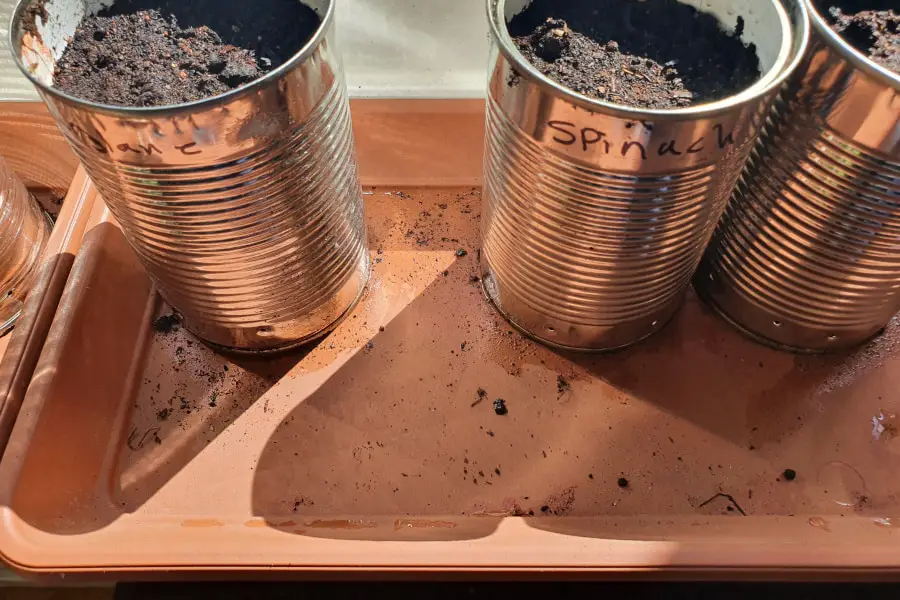
At this point, you should have already made holes in and around the bottom of your cans, but if you haven’t, I still highly recommend doing so. Your plants will grow much better, and the risk of the roots rotting is much lower if they grow in a container where the water can run through.
However, this also means that you need something to place your cans on to prevent the water from going everywhere.
The best trays or plates for placing cans or other plant containers have tall edges and no holes. This ensures that the water stays on the tray or plate rather than flowing over. In addition, if there is water left in the tray, the soil from the cans or containers will generally absorb it when needed.
When I grew plants in cans, I quickly found that the easiest thing for me was to use some long but narrow, rectangular trays like the one in the photo above.
It is crucial to place your trays and cans in a good spot where the plants will get enough sunlight but not too much. In the next step, I explain how you can find the right spot for your cans.
9. Place the Tray and Cans in a Sunny Spot
For the first couple of days after sowing your seeds, where you place them is not very important since the seeds are covered with soil and don’t rely on sunlight yet.
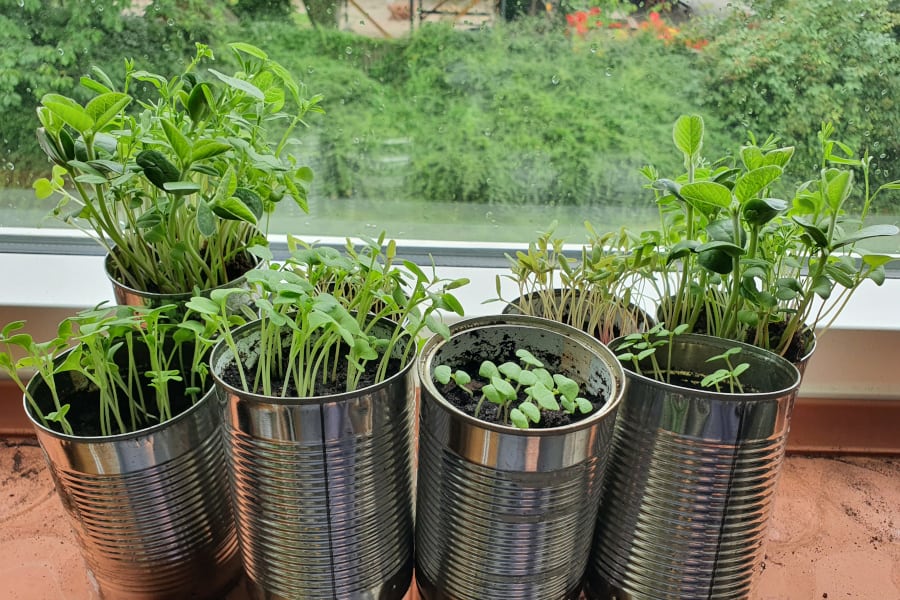
Once your plants are starting to sprout, place them in a spot where they get an amount of direct sunlight that supports the plants you are growing.
A good rule of thumb is to place your plants somewhere where they are in direct sunlight for 6-8 hours per day, but you can usually determine how much sunlight specific plants need by reading on the seed packs. Do this since some plants require less sunlight than others.
If you have a southern-facing window, I recommend placing your plants there if that is an option. Otherwise, place them wherever they can get a lot of direct sunlight. During the longest and warmest summer days, you should be careful that your plants are not getting too much sun, though. As mentioned, 6-8 hours of direct sunlight is good for most plants.
Another important thing to keep in mind when choosing a spot for your plants is good air circulation. Most plants need proper air circulation to thrive, and if they are growing in a location where the air is not moving, the risk of mold and other issues will be significantly higher.
Below, I explain the next step of the process of growing plants in cans; watering.
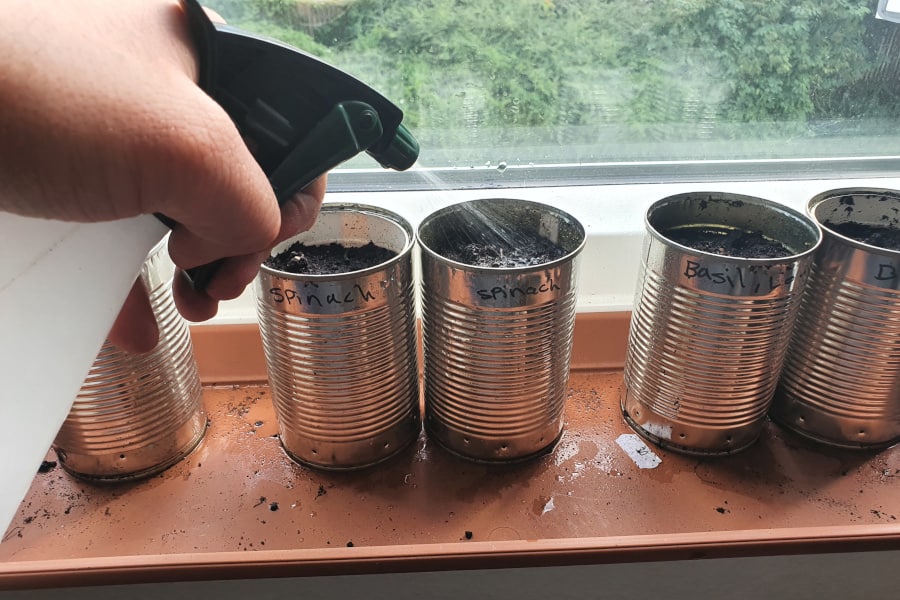
10. Water the Plants Whenever the Topsoil is Dry
How you water your plants will have a huge impact on how well they do. Too little or too much water can inhibit growth or even lead to the plants dying of drought or root rot.
Water your plants whenever the top of the soil feels dry to touch. Before your seeds sprout and for 1-2 weeks after, use a spray bottle for gentle watering and after that, use a small, regular watering can. After 2-3 weeks, begin watering by adding water to the tray or plate rather than the top of the soil.
Watering your plants from the tray or plate is generally a good idea since the soil will absorb the water from the bottom, which forces the plants’ roots to grow to reach the water. Larger roots allow plants to obtain water and nutrients more efficiently.
The last thing you need to know about is properly fertilizing your plants, so I will cover that next.
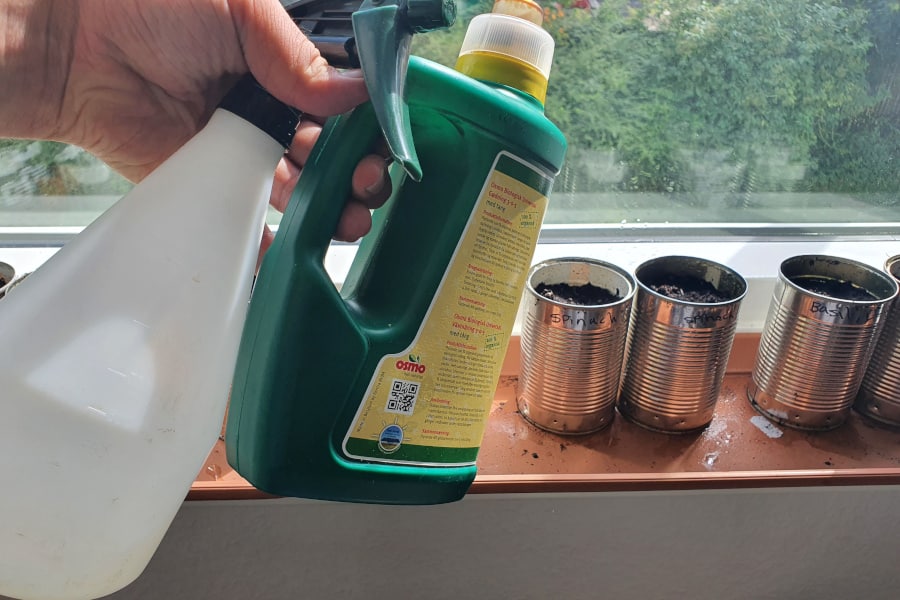
11. Fertilize the Plants Every 2-4 Weeks
Since the plants, you grow in cans are likely relatively short-lived and done once you harvest them, fertilizer is technically not required, although I definitely recommend using it anyway. Fertilizer will make your plants healthier and your harvests bigger.
Fertilize your plants by adding liquid, organic, all-around fertilizer to the water you give your plants every 2-3 weeks. Keep an eye on your plants when fertilizing them, and if they begin to turn yellow or brown or begin to wilt, don’t give them any fertilizer for about a month.
You can get all kinds of fertilizers made for specific plants, and while those fertilizers can work wonders for the plants they are intended for, they generally don’t work very well on most other plants. Therefore, I recommend (and prefer) to use an organic, all-around fertilizer that is made for growing vegetables.
12. Harvest Your Homegrown Plants
If you have followed the steps in this guide, all you have left to do is to water your plants whenever the top of the soil is dry and fertilize them every 2-3 weeks until they are ready to harvest, which should not take long, depending on what you are growing.
It is important to realize that certain plants take longer to mature than others when harvesting your plants. For example, sprouts will usually be ready within 1-2 weeks, whereas herbs such as basil and parsley and leafy greens such as lettuce and spinach can be harvested within 1-3 months, depending on the variety.
Congratulations on planting your first can-plants! If you followed all the steps in this guide, you should see great results very soon.
Gardening can be quite an expensive hobby, but it does not have to be, and to use tin cans as an alternative to pots is just one way of saving money. If you are curious about how expensive gardening generally is and how you can save some money on it, take a look at this post.
